Enrich your SharePoint list data using Microsoft Flow and API’s

Why enrich data?

Adding enrichment to existing SharePoint list data surfaces additional fields that can be searched and refined, can be used for business intelligence, or simply use for an upcoming report. For example, company names and postal addresses within a SharePoint list are common for an organization. Imagine typing in basic information for a company or client, but besides that basic information, items like company economic data, LinkedIn profile, a Bing Map and demographic information of the area appear in the same list as the address. Adding that information by hand is inefficient. Purchasing enrichment lists is expensive, and most times the data you receive is suspect. Think about adding a company name and address, and having a Flow add multiple fields to that list without the investigation and the typing or effort that it would take. This is only one example of data enrichment, but let your imagination run wild! Data enrichment is no longer reserved for “Big Data” solutions and I will show you how to add beneficial additional metadata to your existing list in SharePoint, along with other tips and tricks that I have found along the way.

What is the process for enriching data?

For the sake of clarity, I will be covering the use of Microsoft tools (mostly SharePoint) in my blog examples. The overall process would be similar across other systems, I just won’t be covering them here. The pre-requisites required prior to adding data enrichment on a SharePoint list are:

  • Source data – This is the data that exists in your system. For this example we will assume you have a list of addresses of important places in a SharePoint list.
  • Enrichment sources – There are many free API’s that are available on the internet from the US Government, for both national and local levels. Most free sources do require you to register to get an API key. This allows for a larger amount of use of the API’s (more calls per day, no limit on amount of records being returned, etc). For Census data, see https://www.census.gov/data/developers/data-sets.html for a list of available data sources to use. Doing a few Bing searches will point you to API’s available to use. I will supply a list of sources with url’s that I have used in an upcoming blog post.
  • Postman – this is an invaluable tool to use when doing any kind of API work. Postman allows you to create ‘Get’ and ‘Post’ calls to the chosen API, and view the JSON payload prior to setting up an HTTP connector in Flow or Logic Apps.
  • A willingness to learn, grow and have fun while doing so!

The general concept

For this demonstration, I will be using the zip code supplied in a SharePoint list, sending that zip code to a REST service using Flow, and returning the latitude and longitude for that zip code.

The SharePoint list

For this enrichment walk-through, begin by creating a custom SharePoint list with separate columns for address, city, state and zip code as a text column. I typically use Site Columns as it reduces the need to create a managed property later.
You will also create a column for each enrichment piece that you will be writing back to the SharePoint list. Add a column for longitude and a column for latitude as a number column.

Test the API using Postman

We will add an “HTTP” connector to the flow to call the Census.gov API. There are many available fields within the Census API, I will not go into them in this blog but instead I suggest that you navigate to the US Census Developer page here and view the vast amount of resources they have provided. I will be using the Census geocoding services to send it an address, and return a latitude and longitude. It is a good idea to utilize Postman for your API call development, prior to writing the “HTTP” connector piece into your flow.

First, find the base URL and the required parameters needed for this API to return a lat/long from an address from the online documentation.
For this example, I will be using
https://geocoding.geo.census.gov/geocoder/geographies/address? uri to send the service an address, and return the latitude and longitude (Most additional calls within the Census API require the latitude and longitude value).
The required parameters for this uri are either a one line address, or an address, city, state and zip code.
Paste the uri into Postman (or if you are daring), straight into the “HTTP” connector.

Supply the address parameters along with:

  • the benchmark=Public_AR_Census2010
  • the vintage=Census2010_Census2010
  • the layers=all
  • the format=json
  • hit the Send button.

The response will return with a long amount of JSON formatted text. You will see that there is an “x” and a “y” parameter returned. This is also a great time to try different parameters to see different results, or move on to building the flow. The purpose of using Postman is to verify that the returned results are what we want.

It is important to point out that using Postman first will go a long way in debugging an enrichment flow. You have a response with real data and know that works!

The Flow

Once you have your list columns in SharePoint, and an API call that returns the values we need, the next step it to open up Microsoft Flow in your browser and create a blank flow. Next, connect the trigger “When an item is created” to the SharePoint list you created. Then, add the “Get item” connector.

Add the “HTTP” connector and dynamic values

Add an “HTTP” connector to the Flow and paste in the uri string from Postman. We will remove the static text and replace it with dynamic values that are sent by SharePoint each time a new address is added. Highlight and replace the static text using the dynamic content pane. (If all of your values do not appear, select the “See More” in the dynamic content picker). Leave the other parameters within the uri string.

Parsing the API results

When the API runs and returns its results, it is a good idea to parse the JSON file for Flow to be able to select the individual values easier. Add a “Parse JSON” connector to the Flow beneath the “HTTP” connector. You will select the body of the API call and you will need to provide a JSON schema for the parsing to be done correctly. You have two choices; either use the returned JSON body within Postman, or, add an address to your SharePoint list, and then review the Flow run history and use the value from that run.
Either way, you will need to select the entire output of the JSON call and paste it within the Parse JSON step.

Within a successful Flow run, you can see the results of each Flow connector step. Select the “body” that was returned from this flow run to add to the Parse JSON step.
Proper JSON Schema added to “Parse JSON”

Writing the latitude and longitude value back to SharePoint

Now that we have made a call to the Census API and we have supplied it the address, we will need to extract the value from the JSON response body that we have parsed. and write those values back to SharePoint. This will be the enrichment of the data. These values are stored in the JSON file as “x” and “y” (X=longitude and Y=latitude).

Add the “Update Item” connector to the Flow, and select the Site address, the list name and the ID (same list and item as we started with). You will then add the values from the “Parse JSON” connector to the latitude and longitude fields.

You will notice that Flow added an “Apply to each” connector. This is common when using JSON values within Flow. I wanted to keep this a basic enrichment post, so I left the steps as is. In practice, we are sending and returning a single name value pair to the API, and expect a single name value pair returned. In future blogs, I will show how to use the expression editor to add the value directly to the list field without the “Apply to each” connector.

What have we done?

In this demonstration, we have started with a SharePoint list, added columns for Address, City, State and Zip code. We have then added a latitude and longitude column for enrichment. We called an API from the US Census, sent it our address that we entered into the SharePoint list, and returned a latitude and longitude for that address. Pretty cool huh? You can now find current weather, the population, when the International Space Station will cross overhead, just about any positional based information can be added to your list. This is called data enrichment, and it is a powerful addition to your SharePoint lists!

Add enrichment to your data with Power Query – Instead of an HTTP connector

As I lead into my presentation and demos about Adding enrichment to your data in SharePoint and Azure using Microsoft Flow and Logic Apps this Saturday at SPS Pittsburgh, I realize that the topic of suggesting using premium connectors in Flow to enrich your data may not work for everyone because of pricing. Not all of us can afford to pay for additional licensing.

No worries! I have documented a way to connect to various free, third-party data sources using Power Query, and adding that data to your data set, prior to uploading to SharePoint!

Find the right data sources

I will be bringing in a data set of all building permits requested and issued in the Washington DC area. I theorize that building permits will be issued and approved more often to those that live in an area with a higher median income. The key to this solution, is that it has to be a targeted API uri that will return the values you need. There are many open data API’s on the internet. One that I visit regularly is https://dev.socrata.com which compiles open data sources from states and cities in the USA. https://opendata.howardcountymd.gov/resource/kvz2-j5cj.json is the data source I selected to show the permits.

Create a connection in Power Query

Grab Excel, or Power BI, fire up Power Query, and add a new data source.

1.0 Get Data

Select “Get Data” and choose “web”

1.1 Connect with Anonymous credentials

Since this is a public API, there are no credentials needed.

1.2 Import the table

When Power Query brings in a web source, it creates a list of records which must be moved into a table. You are prompted for a delimiter, but leave the defaults as is!

1.3 Expand the table in Power Query

You will see an icon in the right corner of the new column. By clicking this, it will expand and then import even more new columns

1.4 Select the columns from the enrichment API that you want

1.5 Rename the new dynamic columns in the new data table

This is not necessary, but is a sound practice.

2.0 Bring in the second data set

We are next going to add a static data set from a csv file. I am getting a list of US Zip codes with median home value and median income compiled by the University of Michigan. Download the csv file to your computer. You will need it in the next step.

2.1 Add the csv file to Power Query

This step adds the csv data to the Power Query editor as a table.

2.2 Select the data required

Within the data set I downloaded, there were three tabs of data. I only want the median household income, so I just selected that.

2.3 Merge the queries

This step is what will connect the key fields in both the table and the API that you have brought in. After this step, you will produce a new table that has joined all the information from the query (Building permits by zip code) to the Median Household income by zip code table.

2.4 Expand the merged table column

When creating the merged table, understand that the column may need to be expanded again as in the previous steps. Think of expanding the columns within the Power Query to be like parsing of the JSON file.

Again, double click on the icon in the right corner of the row table. (in this case “Median”)

2.5 Expand and select columns to display

Select the columns that you would like to expand into this merged data set.

2.6 Bask in the knowledge that you enriched your data with an API and didn’t need a premium connector!!

3.0 Use the newly enriched data

Here I wanted to understand if more building permits were issued to those with a higher income.

Turns out, it is the people in the middle of the income range that pull the most building permits. Who would have known! Well, YOU now know that you can add enrichment to data sources within Microsoft without using Flow HTTP!

Happy Enriching!

SharePoint Saturday Pittsburgh 2019

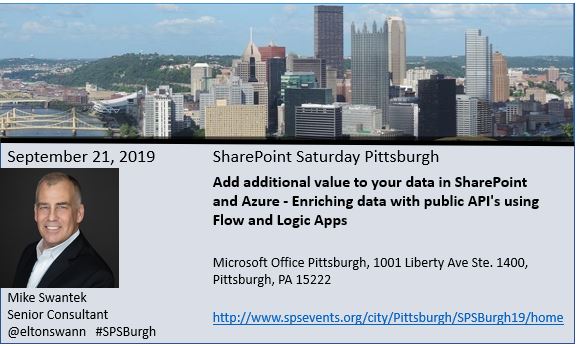
Very excited to be speaking September 21, 2019 at the SPS Pittsburgh event!

If you are in the greater Pittsburgh area, sign up for a great day of learning and sharing with fellow SharePoint users! I will be posting several blogs prior to the event, as well as my slide deck as the session gets closer.

http://www.spsevents.org/city/pittsburgh/SPSBurgh19/home

Use a ‘Try, Catch’ in Logic Apps / Flow

I am creating a Logic App that utilizes a REST API from UPS (by way of the USPS) to verify and correct physical mailing addresses in the USA. I have a SQL Table that houses name, address_1, address_2, city, state and zip code. There are issues with my list of physical addresses, mostly that the address_1 and address_2 lines are combined into the address_1 field, or there are misspellings in street names, etc. On top of that, depending on the address, the USPS API will generate response JSON that is either a string, or an array, or an array of array’s! Because of this, several steps are required in the Logic App to decide which parsing strategy to utilize. This is where the error handling, or ‘Try-Catch’ comes in.

I will first show the API connection, and then walk through the entire Logic App to explain. After some searching for a reliable, easy API for address verification, I decided on the USPS. If the US Postal Service is delivering mail to these addresses, they must know they are valid, right? Turns out though, that the USPS API returns XML…. I wanted JSON response to be returned, so I kept looking. I then found that the UPS Address Validation API uses the USPS, but returns the results in JSON! Here is the UPS web site for the API.

1.0 The API

After creating a user account for the API (FREE!!), access the API resources and begin. I like to use Postman to try out my API’s prior to coding them in Logic Apps / Flow. Here you can see that the Address Verification is made using a Post call, and body to carry the request. It requires your user name, and your access license, which you will receive when you request an account.

Postman

There are several fields that are required prior to sending the request.

  • Address line – the house or building address (address line 1 and address line 2 go here)
  • Political Division 2- the city of the address
  • Political Division 1 – the state of the address
  • Postcode Primary Low – the zip code of the address

Once these fields are satisfied, the request can be sent, and you will receive a response from the API. Notice that both “candidate” and “address line” are both returned as array’s. However, some addresses will return only a string result. This is where the ‘Try-Catch’ comes in handy!

{
"XAVResponse": {
"Response": {
"ResponseStatus": {
"Code": "1",
"Description": "Success"
},
"TransactionReference": {
"CustomerContext": "Your Customer Context"
}
},
"AmbiguousAddressIndicator": "",
"Candidate": [
{
"AddressKeyFormat": {
"AddressLine": [
"6321 MIDDLE RD",
"APT 17"
],
"PoliticalDivision2": "ROMULUS",
"PoliticalDivision1": "MI",
"PostcodePrimaryLow": "48174",
"PostcodeExtendedLow": "4211",
"Region": "ROMULUS MI 48174-4211",
"CountryCode": "US"
}
},
{
"AddressKeyFormat": {
"AddressLine": "xxxx MIDDLEBELT RD",
"PoliticalDivision2": "ROMULUS",
"PoliticalDivision1": "MI",
"PostcodePrimaryLow": "48174",
"PostcodeExtendedLow": "4211",
"Region": "ROMULUS MI 48174-4211",
"CountryCode": "US"
}
},
{
"AddressKeyFormat": {
"AddressLine": "6321 MIDDLEBELT RD",
"PoliticalDivision2": "ROMULUS",
"PoliticalDivision1": "MI",
"PostcodePrimaryLow": "48174",
"PostcodeExtendedLow": "4209",
"Region": "ROMULUS MI 48174-4209",
"CountryCode": "US"
}
}
]
}
}

Using some of the data in my contact table, I chose different addresses and arrived at 4 distinct types of format that the API returns. From there, I built my Logic App / Flow.

2.0 The Logic App / Flow

This is the entire Flow.

The “Scope” connector is a wonderful tool to containerize steps within a Logic App / Flow. The entire connector will fail or run, and by defining the “Configure Run After” settings for each Scope set, you can define what will happen if one step fails.

2.1 Creating the Logic App / Flow

The Logic App / Flow begins (for this demo) with a trigger connector to input an address to test, next, I set up variables for each of the address sections, and creating a combined address field of address 1 and address 2 in the event there is an apartment, etc. This concatenated field has a comma separating the two values, per USPS regulations.

*Address_2 is set up as optional….

2.2 HTTP call to the API

Insert an HTTP connector into the Flow and configure it per the UPS API document. Include the defined headers and fabricate the body as below, inserting your dynamic values into the body as well.

HTTP call to the API from the Flow

2.3 Insert a Scope connector and add logic within it

The scope connector is listed under the ‘Control’ section. Scope connectors allow a series of connectors to be encapsulated within it, and inherit the last terminal status (Succeed, Fail, Cancelled, Skip) of the actions inside of it. This way, if any portion within the scope connector fails, the entire connector will fail. By combining this powerful feature with the ‘Configure run after’ setting allows you to perform different actions and let the Logic App / Flow make the decision at run time as to which to perform.

In the above example, this particular Scope control will set the address_1 and address _2 variable from the response of the UPS API call. It will take the first instance of the array [‘Candidate’]?[0] and the first instance of the array of [‘AddressLine’]?[0] for the Address1 variable, and [‘AddressLine’]?[1] for the Address2 variable.

As you may remember from earlier, some addresses sent to the service contained just strings for the address, and some are multiple responses (ambiguous addresses) that are arrays of strings, or arrays of arrays!

"Candidate": [
{
"AddressKeyFormat": {
"AddressLine": [
"6311 MIDDLEBELT RD",
"APT 7"
]
,
"PoliticalDivision2": "ROMULUS",
"PoliticalDivision1": "MI",
"PostcodePrimaryLow": "48174",
"PostcodeExtendedLow": "4211",
"Region": "ROMULUS MI 48174-4211",
"CountryCode": "US"
}
},

2.4 ‘Configure run after’

This is the setting that makes everything run as expected. After adding the additional variations of JSON responses from different address combinations (no address line 2, apartment number of suite in the same line of address 1, etc) configure each of the Scope connectors to run after the preceding Scope has failed. This will allow the Logic App / Flow to continue down the steps and try the next Scope control, until it either succeeds or fails.

You can see the difference in the connection arrows when a ‘Configure run after’ is active.

2.5 Test and implement

Once the Logic App / Flow has been saved, and all the Scope connectors are configured to run after failure, it is time to test the Logic App / Flow with addresses. Once you are satisfied that each of the cases has been tested, it is time to wire it up to your contact list, and either write the corrected addresses back to your data source, or create additional columns to add the modified data to it. Correcting physical addresses this way is great practice to see how ‘Try-Catch’ in Logic Apps / Flow can be used.

Good luck!!

Using ‘PIPL’ API Service and Microsoft Logic Apps to enrich your marketing list

PIPL (“PEOPLE”) is a service used to search for a person and return relevant information about them. This service is a fee per transaction service that will “enrich” the information of a person that you send it. There are several options to use the service, upload a spreadsheet of contacts and select the enrichment you would like returned, or an API that returns a JSON payload. The API has three levels of access ranging from $0.10 to $0.40 per returned record.

The PIPL API is what was used for a project to enrich a marketing list. I selected the “Business” API service. The fields returned are shown in the graphic below.

PIPL API feature selector

PIPL API is SSL compliant and can also accept MD5hashed email to preserve anonymity when transmitting.

Per PIPL, the minimal requirement to run a search is to have at least one full name, email, phone, username, user_id, URL or a single valid US address (down to a house number).

1.0  ORGANIZE DATA IN THE DATABASE TABLE

My marketing list contained first name, last name, address, city, state, zip code and a birth-date. This data will be fed into the PIPL API using an HTTP call in Logic apps.

My database table of contacts was copied, and an additional column was added for adding a status of the record enrichment. I created a table from the master marketing list that only contained records that needed a cell phone and email address.

2.0  CREATE THE QUERIES

Using Postman and the sample queries within the PIPL API documentation, I created and tested the request and JSON response from the PIPL API. There are many search configuration parameters available for use in this API to minimize incorrect matches, and to also check if the information we needed was in the PIPL database. These “Atomic” queries will only retrieve the information if it exists, therefore reducing the total amount of cost involved using this API. We specifically were interested in the user’s personal email and the users mobile phone number, but the data returned has many more fields available. From the PIPL API documentation, this is a sample response from a person search:

Example of a PIPL response

PIPL made the search easy by utilizing Match Criteria as explained in their documentation. For example, phone.mobile or address.personal were used to define my query. The criteria will be met if the response contains at least one person (perfectly matching or a possible person) which includes a source of the requested category. I also only wanted a confirmed match (we knew who we were looking for), so the “Minimum Match” value was set to 1.0.

Here is an example of the “Free” development search for PIPL in Postman:

This query will return a JSON body that differs slightly from that of a real person however, making the parsing of the JSON within the Logic App somewhat problematic.

The API request that I used within the Logic App looked like this:

http://api.pipl.com/search/?person=@{variables('SetJSON')}&key=qz7xc4xgoucccxxxxxxxxxxxxxxxx&show_sources=matching&minimum_match=1&match_requirements=(phone.mobile|email.personal )

Where ‘@{variables(‘SetJSON’)}’ is the Logic App variable created to hold the request body (see step 3.5 below) and ‘key’ is the unique API key from PIPL that you receive when you have created an account.

Using this ‘atomic query’ would assure that the data I requested was an exact match to the data sent. If there was a match found to a person, I only want returned (the match requirements) to be mobile phone or personal email. If neither of those fields exist in the PIPL database, I will not be charged for that request.

Because of the parsing issues that I ran into in the Logic App (some records returned more data, some less making it next to impossible to use a JSON schema in the Logic App for parsing), and the fact that I was not sending this enrichment to the Search Index using CEWS, I decided to write the entire JSON response from PIPL to a SQL column. The benefit is that a call is made to the PIPL service once, and only $0.40 charge per member is made. The JSON body can then be parsed to get additional member data after the fact. See this Microsoft Document for more information on structuring your queries.

3.0  Create the Logic App

3.1 HTTP REQUEST CONNECTOR

To create the Logic App, I start with an HTTP request and connector. Adding a blank HTTP Request connector allows you to use Postman to trigger the Logic App for testing, or to connect it another Logic App as a webhook.

3.2 SQL CONNECTOR

The next step involves connecting to the Azure SQL database table where the data is stored. The table that this Logic App points to has been created to only contain members that do not currently have an email address, or a phone listed. An additional column was added to contain a “flag” to be set when the enrichment occurred. I will demonstrate that in a later section. I have added a SQL Query Connector to allow precise selection of the data I want to send to the PIPL service.

SQL Query connector in Logic Apps

3.3 SETTING UP VARIABLES

I set a variable of type string to house the JSON body when it is retrieved from the PIPL service.

3.4 FOR EACH AND CONDITION STEP

When the Logic App calls the SQL Query, it loads the data and then each row is sent to the PIPL API. Because of throttling concerns with the service and to be sure that the call sent was the data returned, I decided to set the concurrency setting to “ON” and the degree of parallelism to 1. This would assure that the data sent to the service was returned and recorded before the next request to the PIPL API is sent. Performance took a backseat to a wayward spend of the clients’ money!

SQL Query concurrency set to “ON” for connector

Inside of the “For-Each” is a condition which checks to see if the row has previously been enriched, and if so, bypasses the PIPL enrichment call. Each record that is enriched will then set this flag so the record will not be sent multiple times.

For-each loop

3.5 CREATE THE JSON BODY TO SEND TO API

If the current record has not been previously enriched by the service, the Logic App will then create the JSON body to send to the API using fields from the current line of data. First name, Last name, mailing address and a start and end date for DOB date_range is created as JSON. The ‘Start’ and ‘End’ are the same value to define a birthdate, and not a range of years. This will ensure that a definitive match has occurred for this record. PIPL does allow an age range ( ex. 56-58 would search for people with that name in that range- but the service does not return an exact birthdate)

Create JSON body to send to API

3.6 SEND THE JSON BODY TO THE API

The API call to PIPL is made with a GET call. It includes the api address, the “person =” variable from the previous step, the key from PIPL (be sure to use the correct key from the service to return the values you want to return -see first section of this document), “show_sources_matching” which will only return a person with that specific name, age and address (previous or current), “minimum_match=1” which will bring back only one match, and “match_requirements=(email.personal | phone.mobile”) which only retrieves a person record if there is a cell phone or a personal email in the database. I specifically set the uri with these filters to only return relevant results that I wanted.

HTTP call to PIPL API

3.7 SET THE ENRICHED FLAG TO TRUE IN THE DATABASE

Setting the flag after the record has been passed and responded to will eliminate any duplicate attempts to enrich the record, causing additional spend for the enrichment.

Set a flag in the record to show it has been processed

3.8 WRITE THE JSON RESPONSE BODY TO THE SQL TABLE

A separate table was created in the database to write the JSON response and the MD5Hash (unique record identifier). The JSON response column is set to nvarchar(max) to allow for the content to be housed in the SQL table.

Write the JSON back to SQL table

The JSON response body can now be queried and extract email and phone number, along with other relevant user documentation from the table, while allowing the data in this table to be joined to other tables by utilizing the MD5Hash value that is the unique identifier for the record.

4.0  THE RESULTS

The results using the PIPL API service were better than expected. Parsing the data at run time was the most challenging, which is what drove me to store the values within SQL. Many of the records have multiple email addresses, and phone numbers. PIPL does show the most recent ones first in the array and includes dates of when their last know use was. These are helpful fields when identifying the best record to select.

Some other notable results that PIPL will identify are: known associates, education levels, social media profile handles, VIN numbers and registration information, and PIPL will even correct addresses that you entered. For example, “City ‘Detroit’ was changed to Redford based on the street and ZIP code” is an actual response from the service. You could easily check if PIPL returned a “warning” and if so, use the corrected mailing address to replace the incorrect one in your contact list.

4.1 Working with the JSON data in SQL

Here is a sample of the SQL query that will pull the warning out of the JSON body. Again, storing the JSON in SQL is not a requirement, but provides me with unlimited uses of the customer data going forward. This is a sample of a SQL Query to retrieve data from the JSON column:

SELECT MD5Hash,JSON_VALUE(responseJSON,'$.warnings[0]') AS warnings,JSON_VALUE(responseJSON,'$.query.addresses[0].display') as correctedaddress
  FROM [dbo].[tbl_Marketing_PIPL_enrichment]
  WHERE JSON_VALUE(responseJSON,'$.warnings[0]') IS NOT NULL

4.2  SOURCES OF KNOWLEDGE FOR SQL IN JSON

The following links are Microsoft Documentation about JSON in SQL. They are useful as are the videos within the pages. It was fun learning a new skill, and JSON within SQL holds some promising future!

5.0 The Wrap-Up

The use of any service to enrich your customer data is a risk/reward proposition. Not knowing if the email you find to enrich your marketing information will bounce, or if the contact information received is still relevant to that customer is always a risk. The data returned by the PIPL service has safe guards in place to validate the last used time of contact information, so the risk using their service is fairly low. The choice to utilize PIPL to enrich your customer marketing lists is both wise and economical.

I will certainly suggest this service to others to try and will be certain to utilize the PIPL services on many more projects!

Happy Enriching everyone!

Finding unique values and remove null values with Logic Apps

Image of a Logic app screen

A few weeks ago, I had a need to take some streaming iOT data and find a list of unique code values it was returning. For each measurement in the database, a machine would record a string of certain codes that we needed to understand. Some measurements yielded a “null” which we needed to remove from the strings of data prior to analysis.

As an example, here is a sample set of values being sent from the device:

B1234,C45,C45,,G4552,H34425,A1234,,,,,,,H45,T3325,,,,Z44,H45,G4552

Our goal is to end up with a string of values that are free of null values and only unique codes. The extra commas are the result of null values being sent.

Setting up the Logic App

1.
Within logic apps, I have a HTTP trigger that will accept the codes from the device.

2.
Create a variable to contain the string of values being received.

3.
Create a large combined string that will hold all the machines values. This is done by concatenating all of the machine strings together.

Use the expression editor to create a concatenated string for all of the values

4.
Next split the new string and store it as an array.


split(variables(‘varCombinedString’),’,’)

5.
Create a loop to remove any of the “null” values in the array of values. This step was assisted by Sandy Ussia (@SandyU) who reminded me that you need to have a condition actually arrive at a decision of true or false. Thank you Sandy!


not(empty(items(‘Get_all_incoming_manged_properties’))) “is equal to” true

6.
I used an expression called “Intersection” within a Compose to compare the original array to the new array without null values. This will return an array with only unique values, and best of all, no “nulls”!


intersection(variables(‘varIncomingSplit’),variables(‘IncomingCodes’))

7.
Lastly, the cleansed array of codes is returned and is sent to another analysis step with the Response.

Again, I wanted to express my gratitude to the Flow and Logic Apps community for always being available for a questions!

Good luck in your data cleansing and automation tasks!

North American Collaboration Summit 2019 Recap

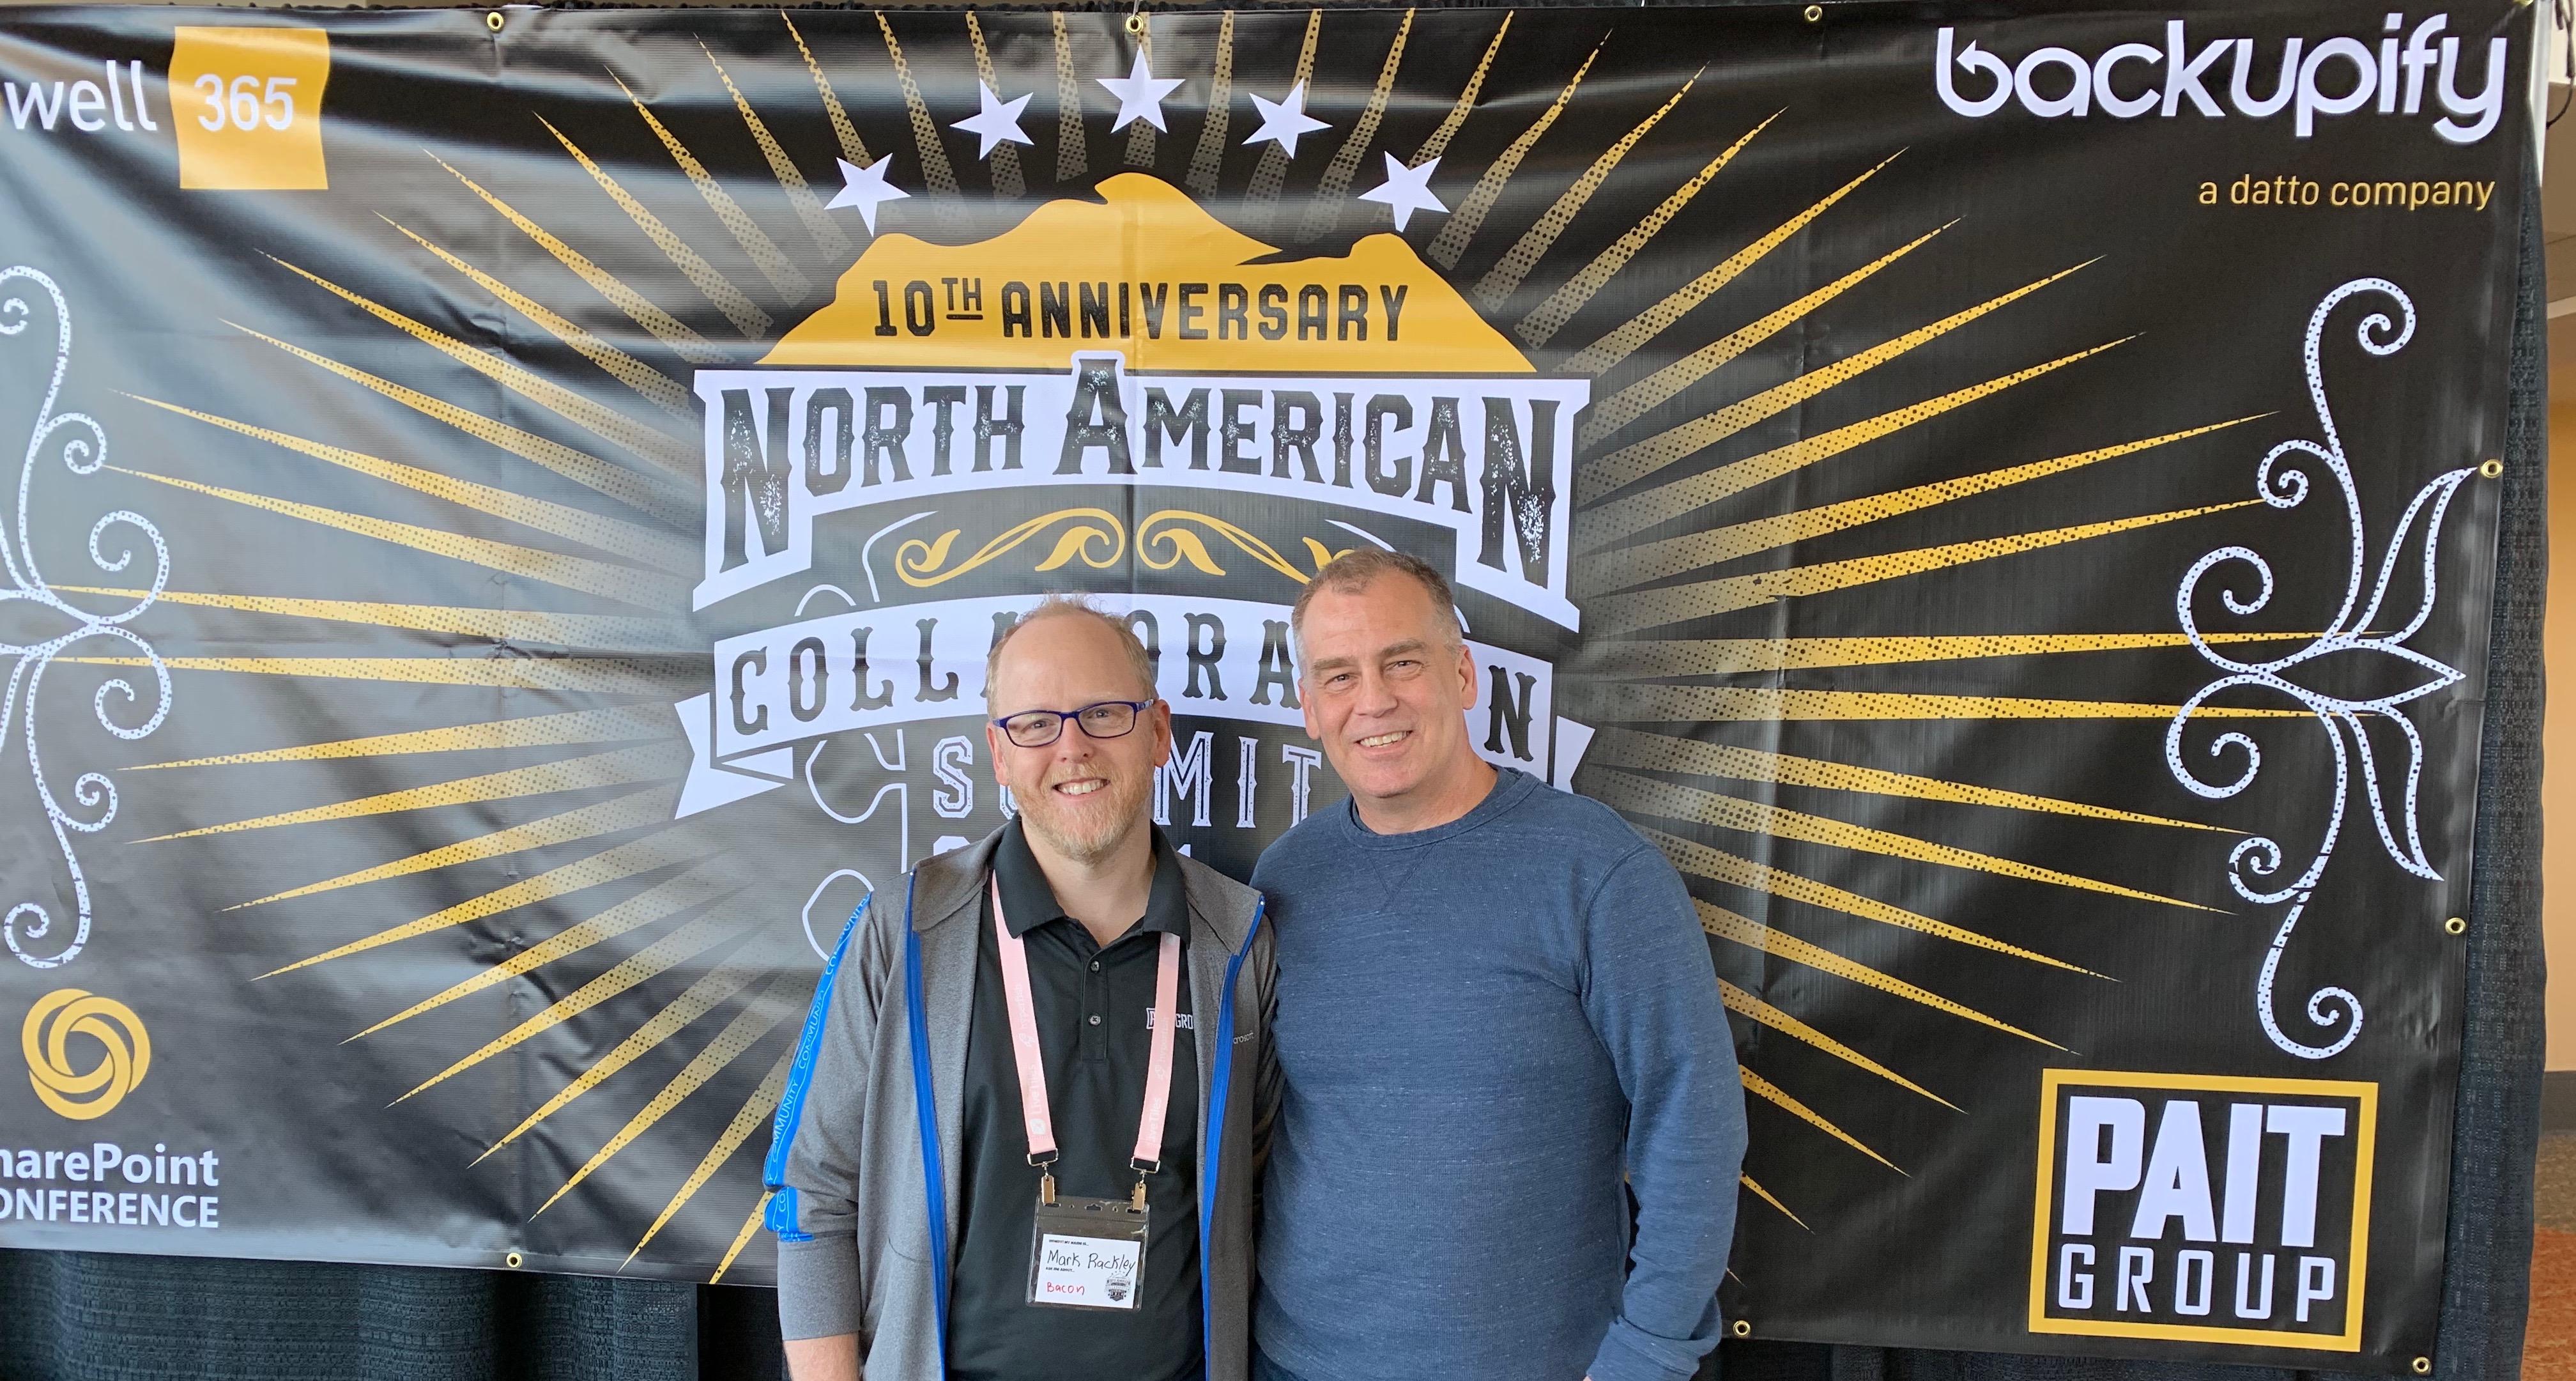
Mark Rackley and Mike Swantek

aka “Confessions from an attendee of the North American Collaboration Summit 2019”

The North American Collaboration Summit was hosted by the “Bacon man” Mark Rackley March 14-16, 2019 in the beautiful city of Branson, Missouri. The Collaboration Summit celebrated its 10th anniversary this year! – They had CAKE! Oh, and they served bacon in the morning too!

This was my first trip in Branson and the first SharePoint conference in quite some time. Branson is a nice small town along the banks of Lake Taneycomo. If you have never been, you owe it to yourself to add this city to your bucket list.

Mark Rackley did an amazing job of bringing together the best and brightest (both in speakers and attendee’s) to his event. The conference was a great mix of SharePoint, Microsoft Teams, and Microsoft Azure discussions and demos at various depths. I attended a myriad of sessions to both learn and to be able to see and hear the speakers that I follow on social media. The big buzz of the MVP summit in Redmond the following week did not distract the speakers from presenting awesome content and conversation throughout.

The sessions that I attended were:

  • List / view formatting in O365 using JSON – Chris Kent
  • Next Level Forms with PowerApps – April Dunham
  • Using Azure Runbooks and Microsoft Flow to Automate SharePoint Tasks – Geoff Varosky
  • Unlocking Your Microsoft 365 Data with Graph Data Connect – John White
  • Mastering Azure Functions for SharePoint – Bob German
  • How to Run a Search Project in SharePoint – Matthew McDermott
  • Building PowerApps on top of Azure SQL – Shane Young
  • Introduction to SharePoint Webhooks with Azure Functions, Queues, and Tables – Don Kirkham

All of the sessions were well presented with a great mix of slides and demos. As I hope to be able to speak at SharePoint sessions in the near future, I took a good number of notes about presentation styles and content.

In the middle of the day, there were keynote addresses by Mark Kashman, speaking and demoing about the “inner” and “outer” rings of the collaboration space within SharePoint, OneDrive, Teams, Yammer and Outlook. Mark also gave the audience a preview of the GA released “Live Events” in Teams with the audience participating on their mobile devices. There were, of course, SharePoint sock give aways during the sessions as well.

Thursday night was the Collaboration Summit welcome event at the Paddle Wheel, an actual floating pub, within walking distance from the hotel. Mark threw an awesome gathering where attendees and speakers were able to mingle, eat, and even listen to live music (with a special guest singer April Dunham on stage for a few songs). I was able to meet John from St. Louis and we discussed AI and Machine Learning in healthcare and ate some choice BBQ as well.

Friday brought more sessions, discussions and chance meetings. Sandy Ussia happened to be walking by me while on a break, and I asked her a question regarding Microsoft Flow and eliminating nulls from a string. She and I had a great conversation, resulting in the start of a following of each other to learn more and share solutions! My next post will share the solution she helped me with.

Besides learning new things, this conference was important to me because I was able to meet some people that had previously existed to me only virtually. I was finally able to shake Nate Chamberlain‘s hand. Tracy van der Schyff -who flew from South Africa, showed off her awesome arm of Microsoft tattoos! Sue Hanley and I discussed the benefits of using Office Lens to flatten projector screen shots while in the audience. I met a teacher that was attending the event and referred him to Brian Dang on Twitter; explaining that he was a teacher and writes about Power Apps and education. I shared with him my excitement of having Shane Young and April Dunham here for PowerApps. Being extroverted isn’t natural for me, but I introduced myself and said hello to people. I enjoyed the openness and the interaction.

Attending the North American Collaboration Summit also gave me the opportunity to finally meet Stephanie Donahue in person. Stephanie is my mentor. During the Ignite 2018 event, I signed up for the Diversity and Tech mentor program from Microsoft and I was contacted in December 2018 and was matched with Stephanie. The mentoring that she provides is insightful, thought provoking, direct and appreciated. The opportunity to ask questions of a practice owner, and to understand what her commitment to the industry brings, makes me grateful for the connection. The fact that I have met a new friend in the community, “Priceless”. I will continue to advocate for this opportunity Microsoft has provided me.

Although the session days were long and the information vast, I left Branson very energized and excited to get back to work. The speakers made it very easy to approach them and talk. What became evident during the week was at a time where our industry is increasingly virtual, it is great to interact with fellow humans and witness human decency. There is no other word to describe these events but “community”. No one is better, worse or smarter. We all have a story, and we all bring value. This is Microsoft, this is openness, this is awesome! The speakers, hosts, sponsors and attendees all contribute to the growth of our collective knowledge.

I am hopeful that the event will remain in Branson next year (and years following) because I have a plan to head back and enjoy more of this beautiful city and the awesome SharePoint community that gathers there!

Thank you to all the MVP’s and contributors in our community. I will strive to provide that same level of commitment in my writing and actions.

As a note, Microsoft MVP’s traveled from great distances to present in Branson-many using personal funds, all for the love of this community and commitment to their craft. I have added links to the presenters I had interactions with, but there are many more also worth following on Twitter. Do yourself a favor and look them up on social media or visit their blogs, as they all provide fantastic content.

North American Collaboration Summit

I will be attending the North American Collaboration summit 2019 in Branson MO, March 14 & 15, 2019. This is the 10th year of this event, and I am excited to be able to network with many Microsoft MVP’s prior to them heading to Redmond for the Microsoft MVP summit. If anyone is interested in attending, here is the link.